
SIP and number configuration
Telephony (Panel → Telephony) lets you connect your own phone number and SIP
trunk the bot uses when calling customers. Outbound calls then show a number your
customers recognize, and you keep full control of telephony traffic.
Setup uses a step-by-step wizard — it guides you through preparing the trunk with your provider and entering details in the panel.
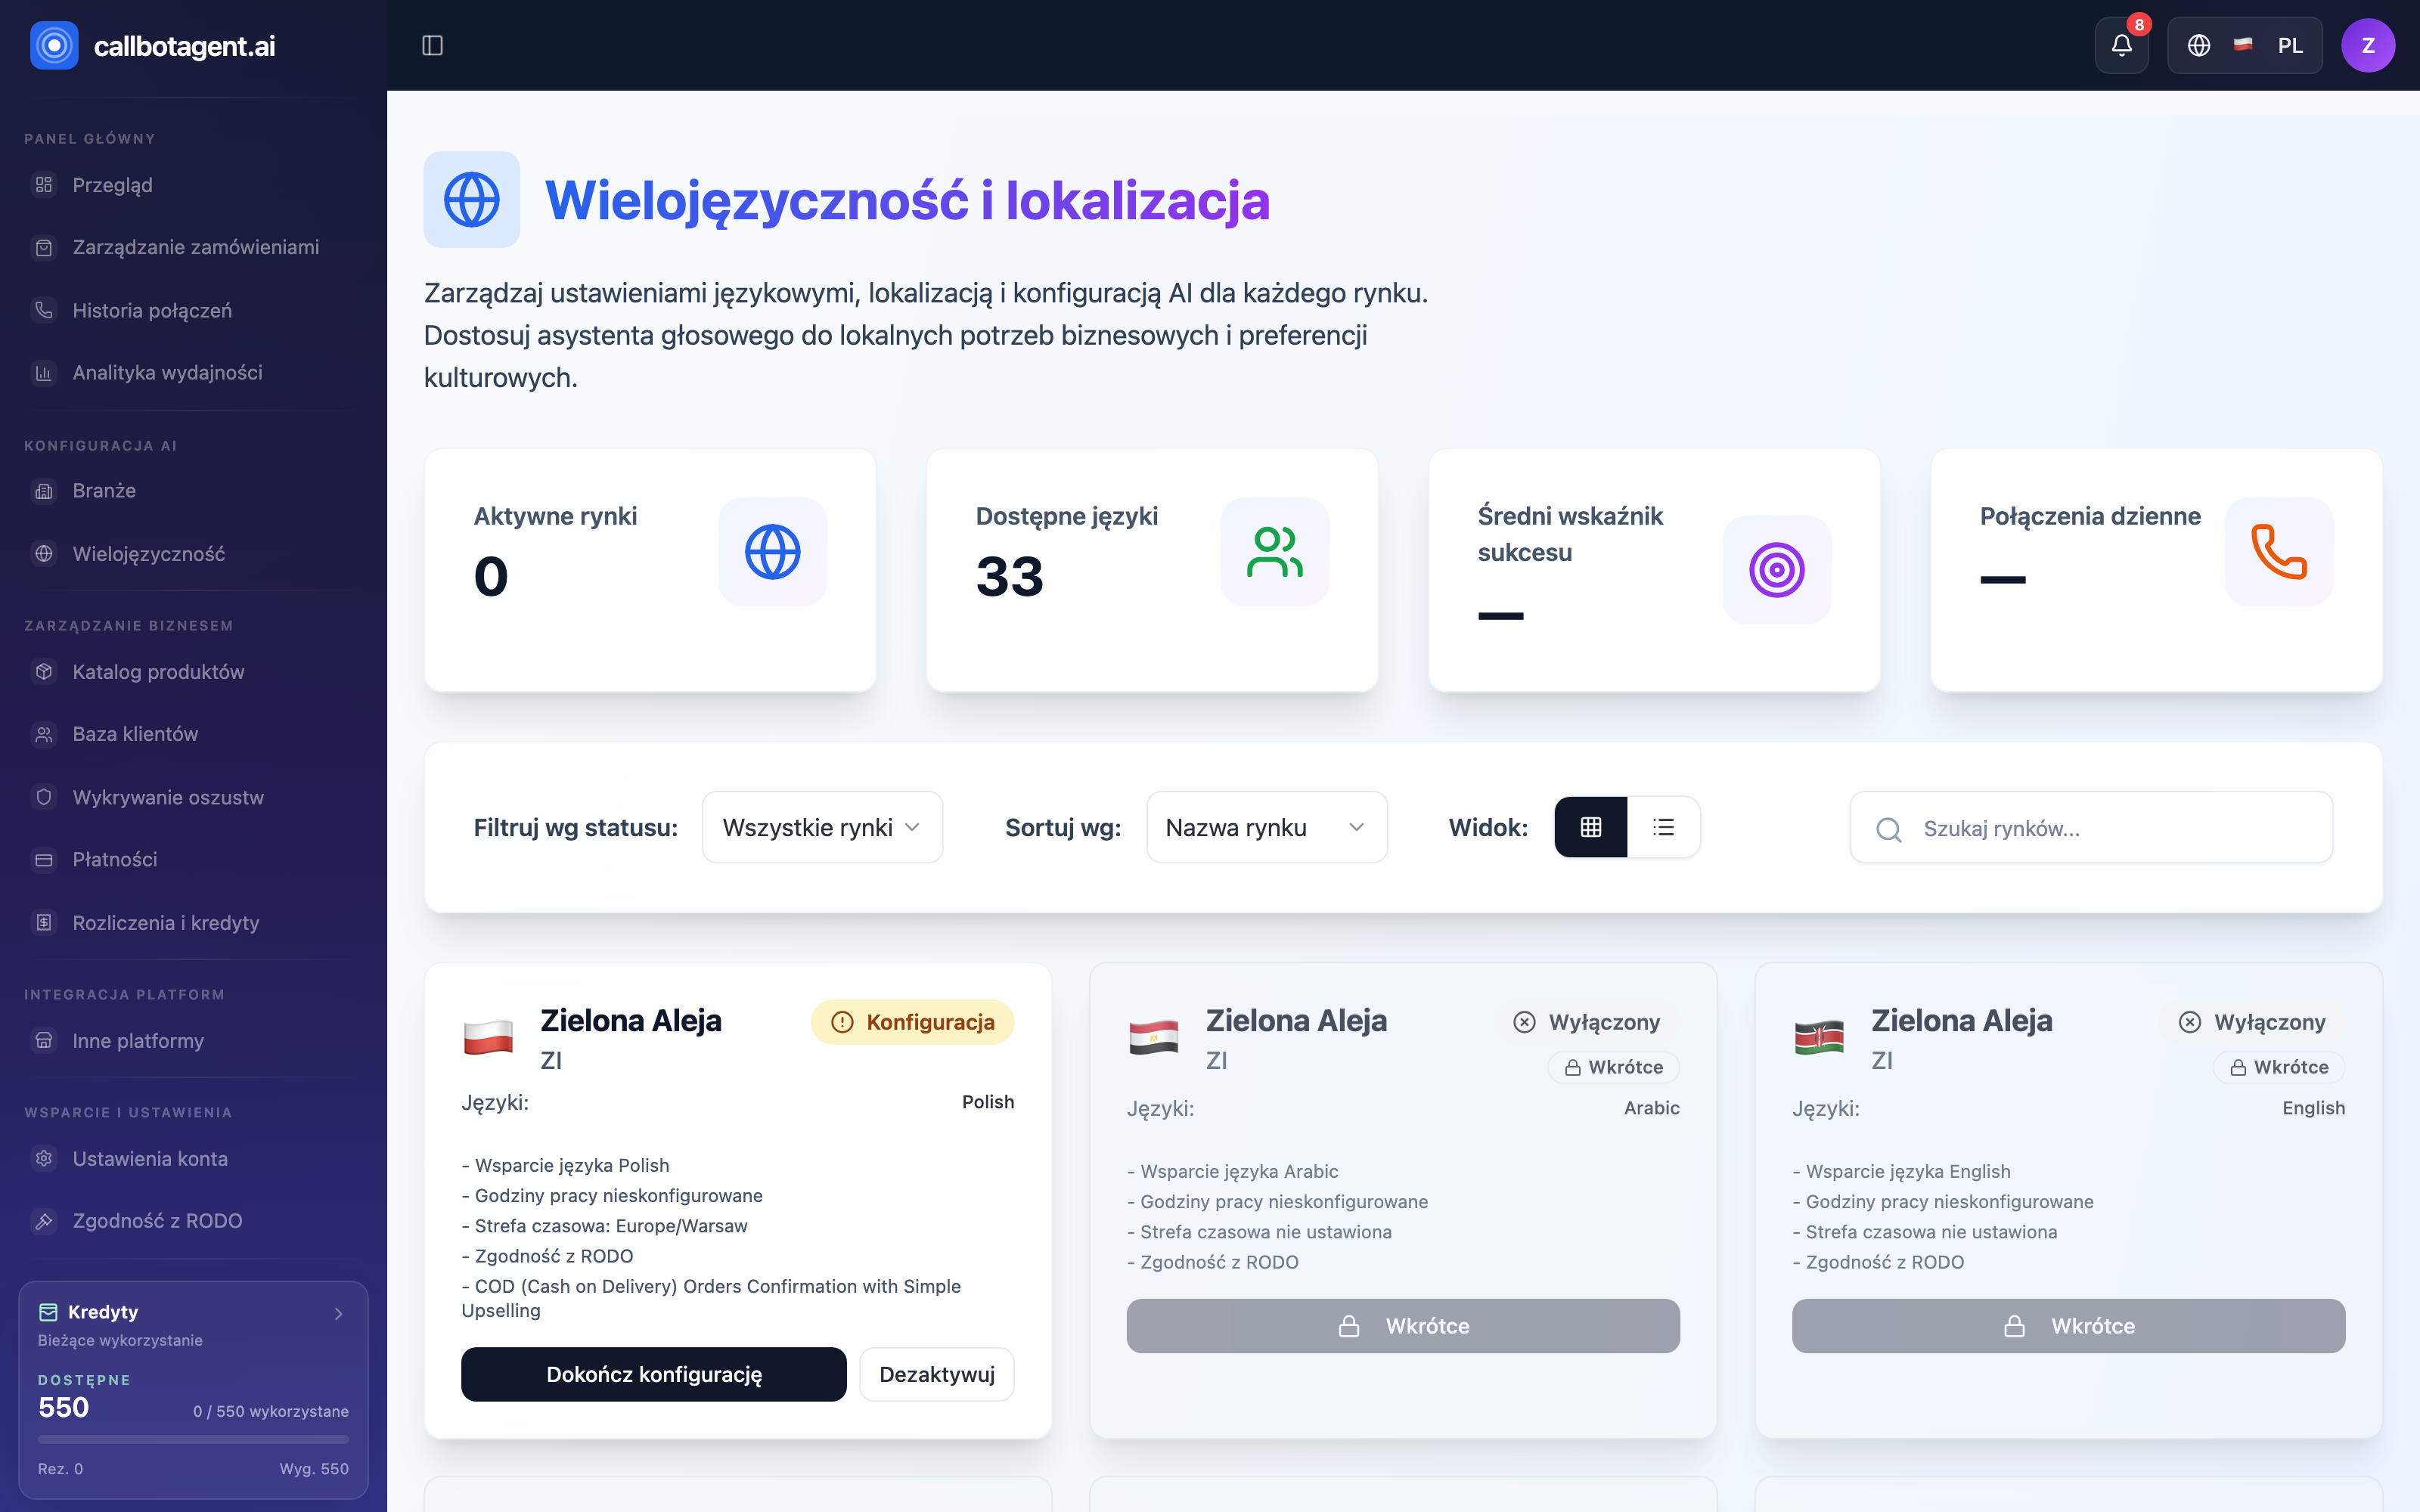 Market cards — each market has its own business hours, time zone, and SIP trunk with number, configured from the card via "Finish configuration". Sample data (demo).
 "Configure" market dialog — "SIP configuration" tab: trunk, number, transport, and credentials. (illustrative screenshot — in progress)
Telephony is tied to markets: each active market has its own SIP trunk and assigned number, configured from that market's card (Finish configuration). Calls for a market go out from the number on its SIP trunk and only during allowed hours per that market's time zone and business hours. Multiple countries can each have a separate number, trunk with your SIP provider, and calling window.
When to connect your own number
- Customers should see your company number, not a default platform number.
- You already have numbers with a telephony provider and want to use them.
- You need a number from a specific country or market.
Without your own trunk the bot can use default configuration — your own number is for stores that want full control over caller ID.
Configuration wizard step by step
Create SIP trunk at provider
In your telephony provider panel create a SIP trunk with separately configured outbound and inbound traffic.
Route inbound traffic to platform
Point inbound (origination) traffic to the platform SIP address the wizard shows at this step so calls reach the bot.
Choose authentication method
Decide how the trunk proves identity: username and password or IP whitelist. The wizard shows what to enter.
Assign phone number
Link the outbound caller ID number to the trunk created. One number maps to one trunk at a time.
Enter details in wizard and test
Return to the wizard, fill trunk address, auth data, and number, set transport to TCP, then run a short test call.
Keep credentials secure. SIP trunk login and password are stored encrypted and not shown again in the panel. Never share them in support tickets, screenshots, or with third parties. If you suspect leakage — change them at the provider and update the wizard.
Transport, codecs, and number format
| Setting | Recommendation |
|---|---|
| Transport | TCP (recommended); UDP and TLS also supported |
| Number format | international +E.164 (e.g. +12125551234) |
| Audio codecs | wideband and narrowband codecs supported |
After saving always run a test call to verify two-way connectivity before the bot calls customers.
Provider not on the list
If your telephony provider is not covered by a ready scenario, the wizard offers advanced (custom) setup. You need from the provider: outbound trunk address, auth (username/password or IP whitelist), and number. When unsure, consult your SIP administrator or contact support — we can walk through configuration.